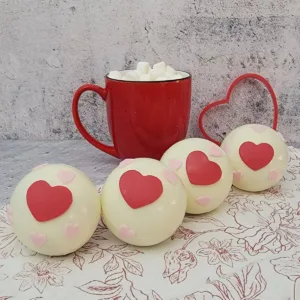
Valentine's Hot Cocoa Bombs
These Valentine’s Day hot cocoa bombs are a simple yet impressive treat that anyone can make. Filled with rich cocoa mix and mini marshmallows, they melt into a warm, creamy cup of hot chocolate
Equipment
- 2 Half Sphere Silicone Molds 6 cavities each mold with a diameter 2.6"
- Bowls, measuring cups and spoons
Ingredients
- 1 cup Hot cocoa mix
- 10 ounce bag Candy melts color of your choice
- 6 cups Milk, steaming hot note: one cup needed for each bomb
- 18 Mini marshmallows
- Decorations Optional
Instructions
Bomb shells
- Pour candy melts into a heat-resistant bowl.10 ounce bag Candy melts
- Place 1" of water in a saucepan and bring to a simmer.
- Set bowl of candy melts over the simmering water. Note: bottom of the bowl should not be touching the water and the water should not be boiling.
- Stir candy melts every few minutes until melted. Remove from heat.
- Using a silicone pastry brush, paint the candy melts into the silicone molds. This is a thin coat - a second coat will be added after the first coat sets.
- Place molds in refrigerator for 10 minutes or until candy melts are set.
- Paint a second coat of candy melts in the molds. Make sure to cover any thin spots. Place molds back in refrigerator for another 10 minutes.
- Remove domes from the mold by pushing up gently from the bottom. The dome should pop out. Note - use clean cotton or latex gloves to prevent fingerprints on domes.
- Gently warm the bottom of a cake pan or baking sheet by placing it over low heat on the stove or using a kitchen torch.
- Working with one at a time, take 6 of the chocolate domes and gently press the edge onto the warm surface just until it begins to soften. This melts away any rough or uneven edges, making the domes easier to seal later.
- Spoon 2 tablespoons of cocoa powder into each of the 6 domes with the smoothed edges. Then, add a handful of mini marshmallows on top of the cocoa mix.1 cup Hot cocoa mix, 18 Mini marshmallows
- Place one unfilled chocolate dome onto the warm pan just until the edge begins to melt. Quickly press it onto a filled dome so the melted edges stick together and form a seal. Repeat this process with the remaining domes to complete your hot cocoa bombs.
- Decorate as desired.
- Place a hot cocoa bomb in a mug. Heat milk until it’s steaming, then slowly pour it over the bomb. Let it sit for a minute or two, allowing the chocolate to melt, then stir until fully combined. Note: Always check the temperature before serving to children to make sure it’s not too hot.6 cups Milk, steaming hot
Video
Nutrition
Calories: 330kcalCarbohydrates: 39gProtein: 9gFat: 16gSaturated Fat: 12gPolyunsaturated Fat: 0.3gMonounsaturated Fat: 2gTrans Fat: 0.05gCholesterol: 29mgSodium: 284mgPotassium: 366mgFiber: 1gSugar: 36gVitamin A: 397IUCalcium: 320mgIron: 0.4mg
Tried this recipe?Let us know how it was!