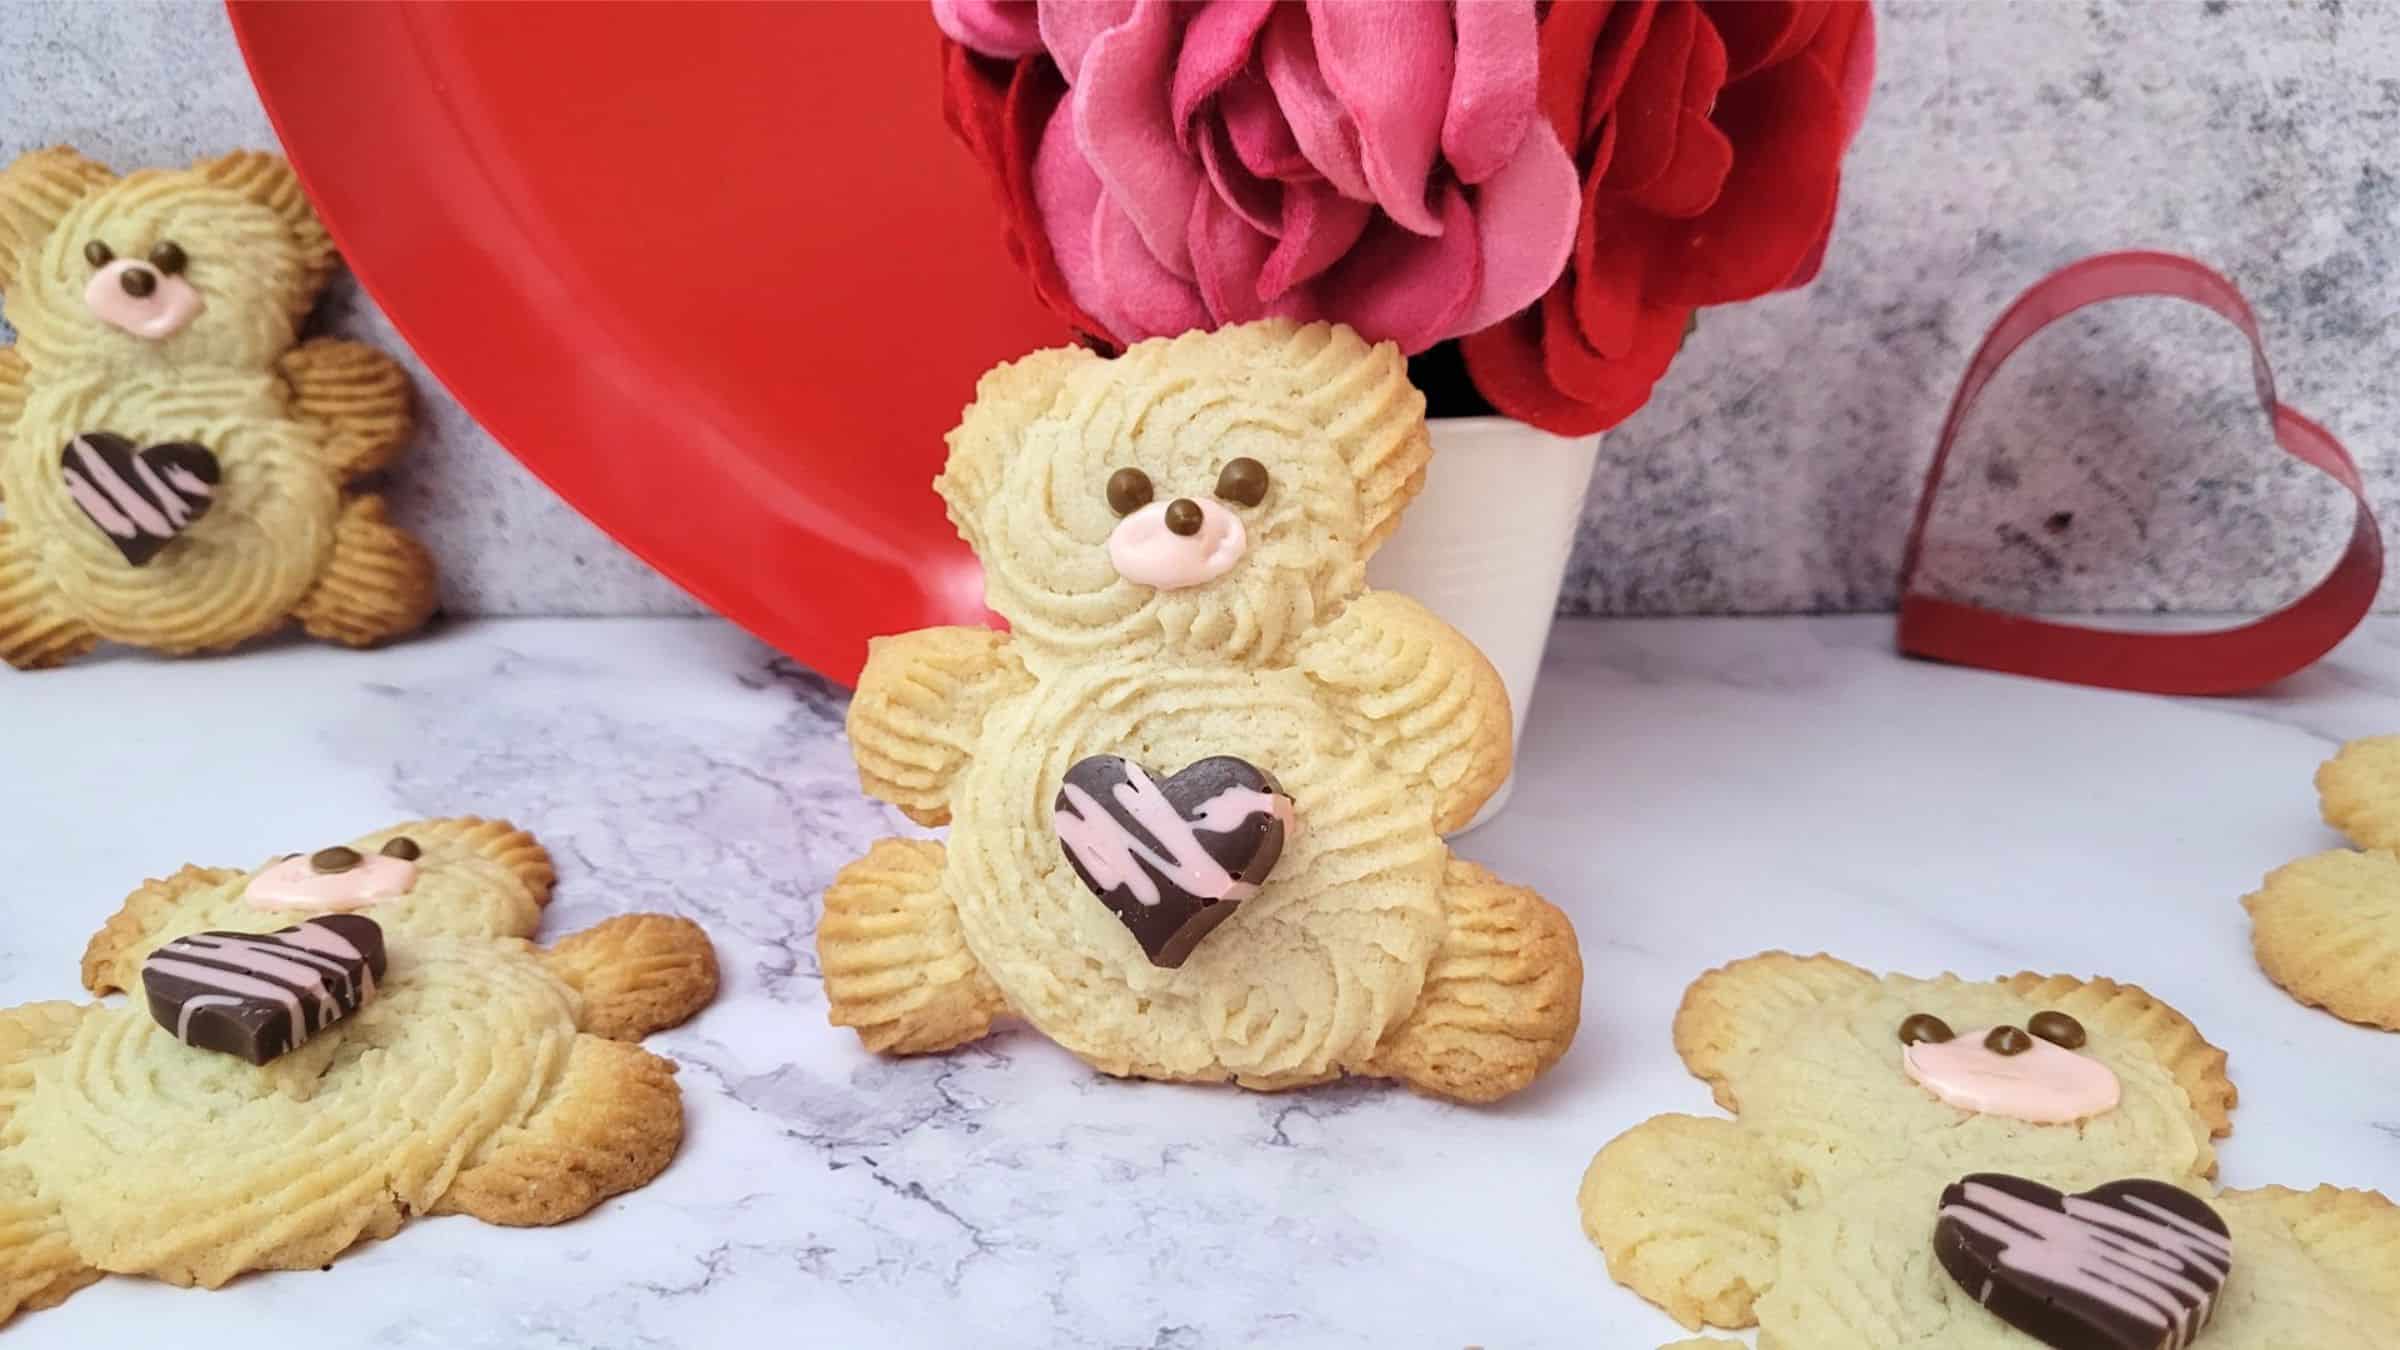
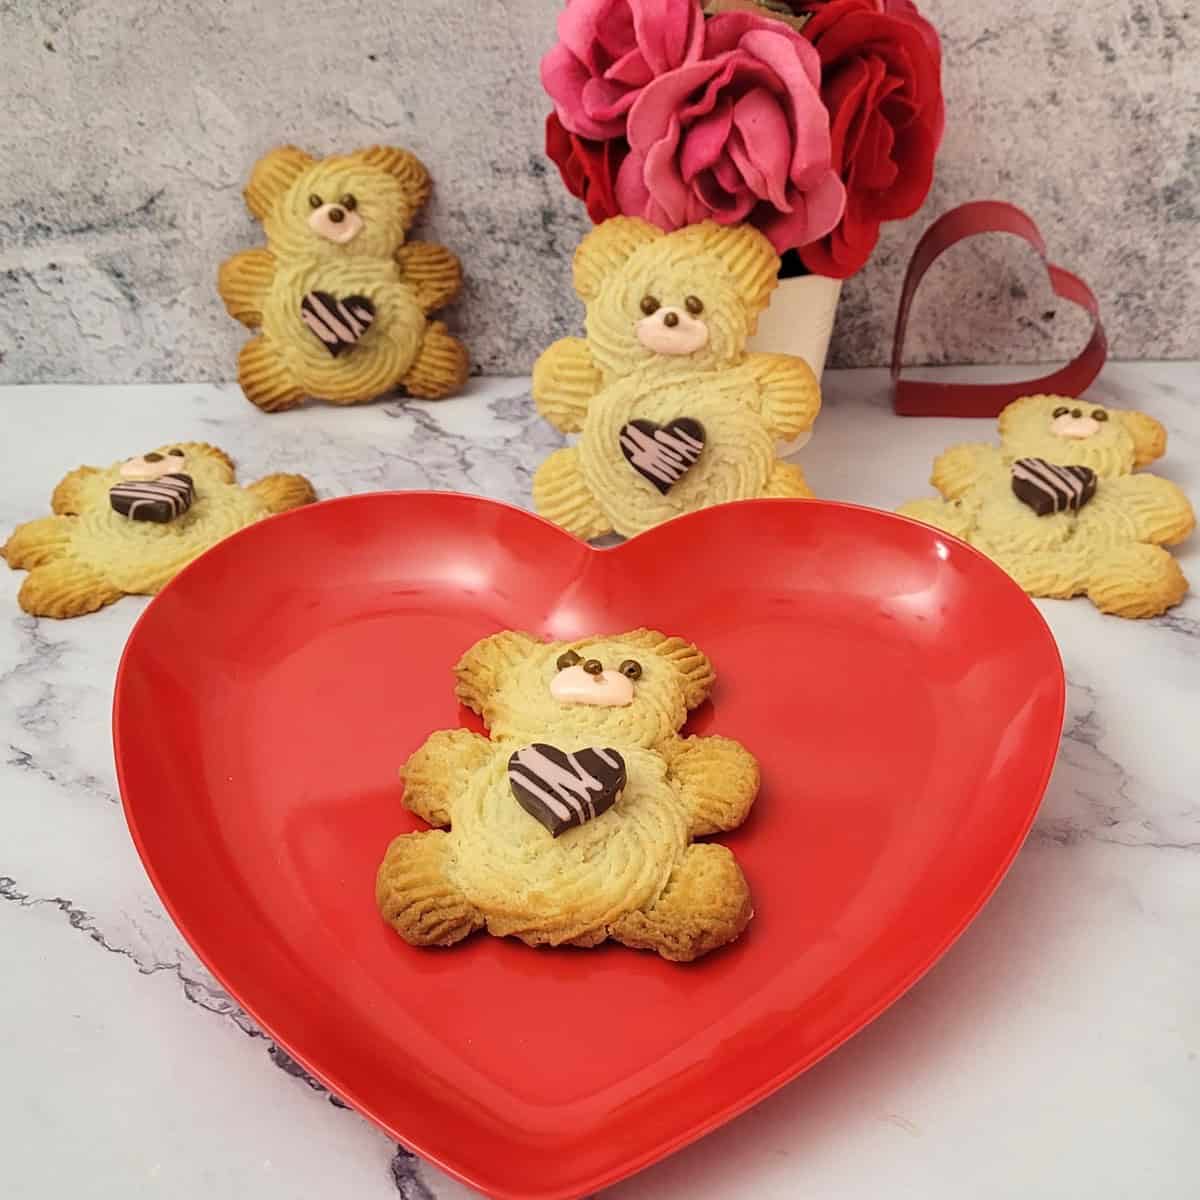
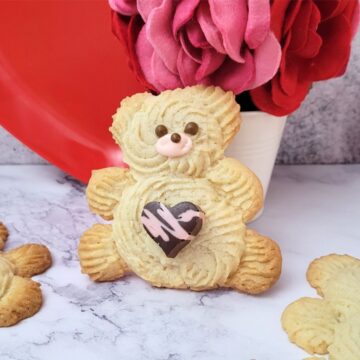
These Valentine Butter Cookies are shaped like adorable teddy bears, adding a touch of cuteness to your Valentine’s Day desserts. They are easy to make and require no advanced decorating skills, making them perfect for bakers of any level.
This post may contain affiliate links. Please refer to the terms page for more information.
Take a little time to prepare these adorable Valentine Bear Cookies. While the cookie dough comes together quickly, be sure to allow the bears to rest in the refrigerator for at least 30 minutes before baking to ensure they hold their shape.
Ingredients
Gather the following ingredients to make this Valentine butter cookies recipe:
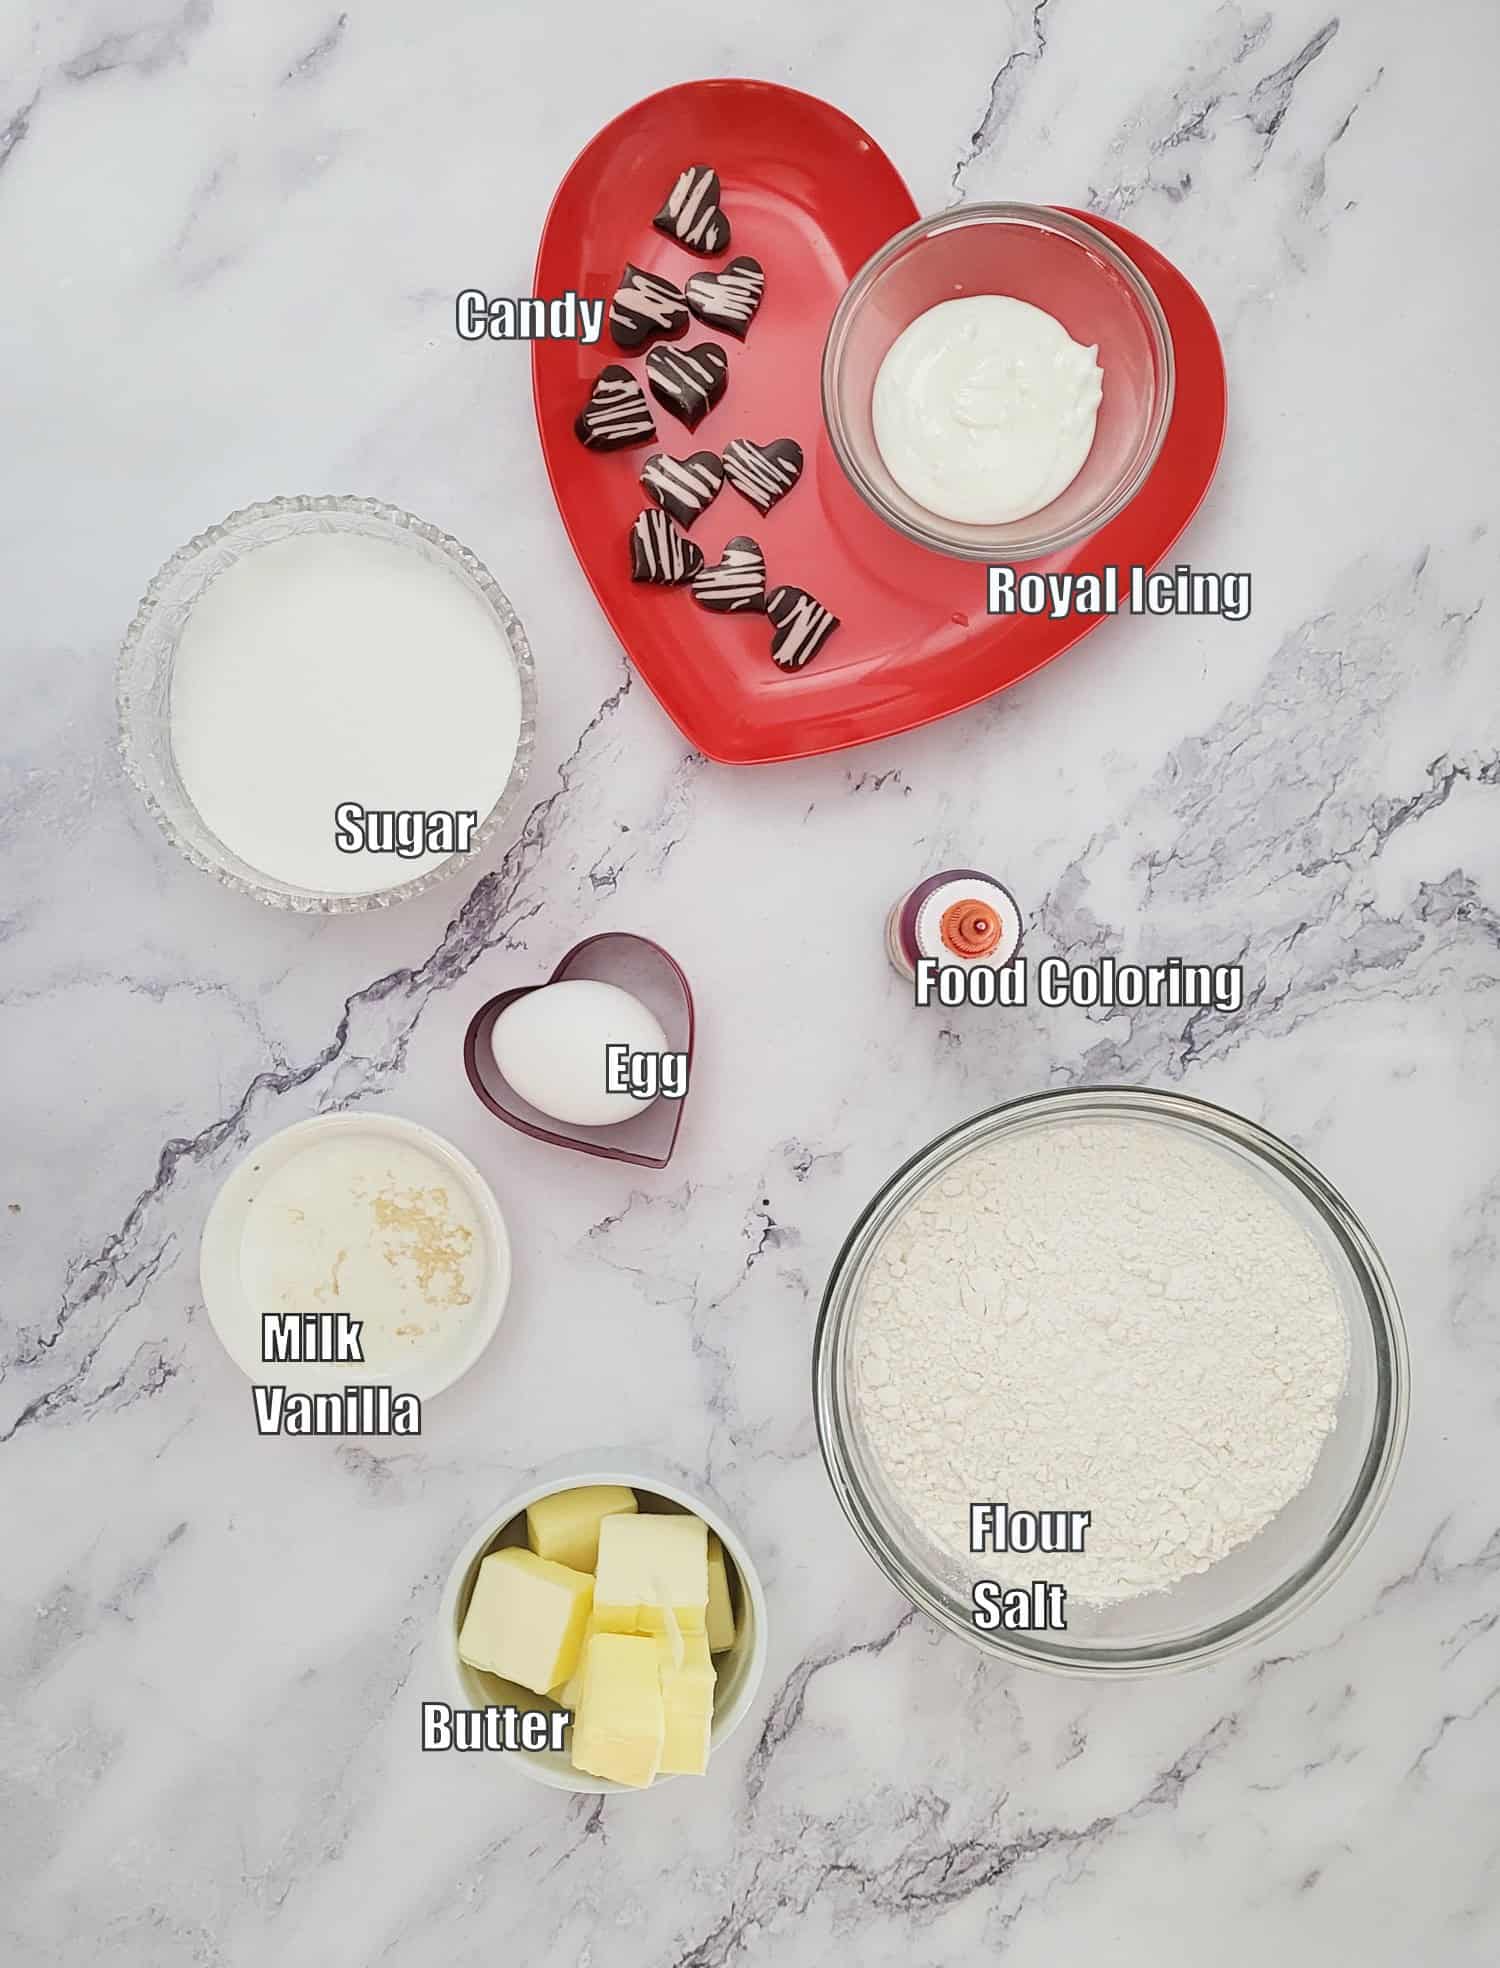
- All-purpose flour and salt - sift flour if necessary to remove any lumps
- Unsalted butter - soften butter before starting recipe
- Granulated sugar
- Egg - bring egg to room temperature before starting recipe
- Vanilla extract - use pure vanilla extract not imitation
- Whole milk or half & half
- Decorations:
- Mini chocolate heart candies
- Royal icing - to attach chocolate hearts and create bears' snout and eyes
- Food coloring - to create pink and brown royal icing
See recipe card for quantities.
Instructions
The first step in making these delightful Valentine butter cookies is to prepare your baking pans. Begin by following these simple steps:
- Create a template to guide you in piping the bears. You can either design your own or conveniently use my free downloadable .pdf template, available here. These teddy bear cookies are 3 inches in height, fitting six cookies per standard baking sheet pan (13" x 18").
- Place template on baking pan and place a sheet of parchment paper or a silicone baking mat over the template.
Next, follow these instructions to make your teddy bear cookies:
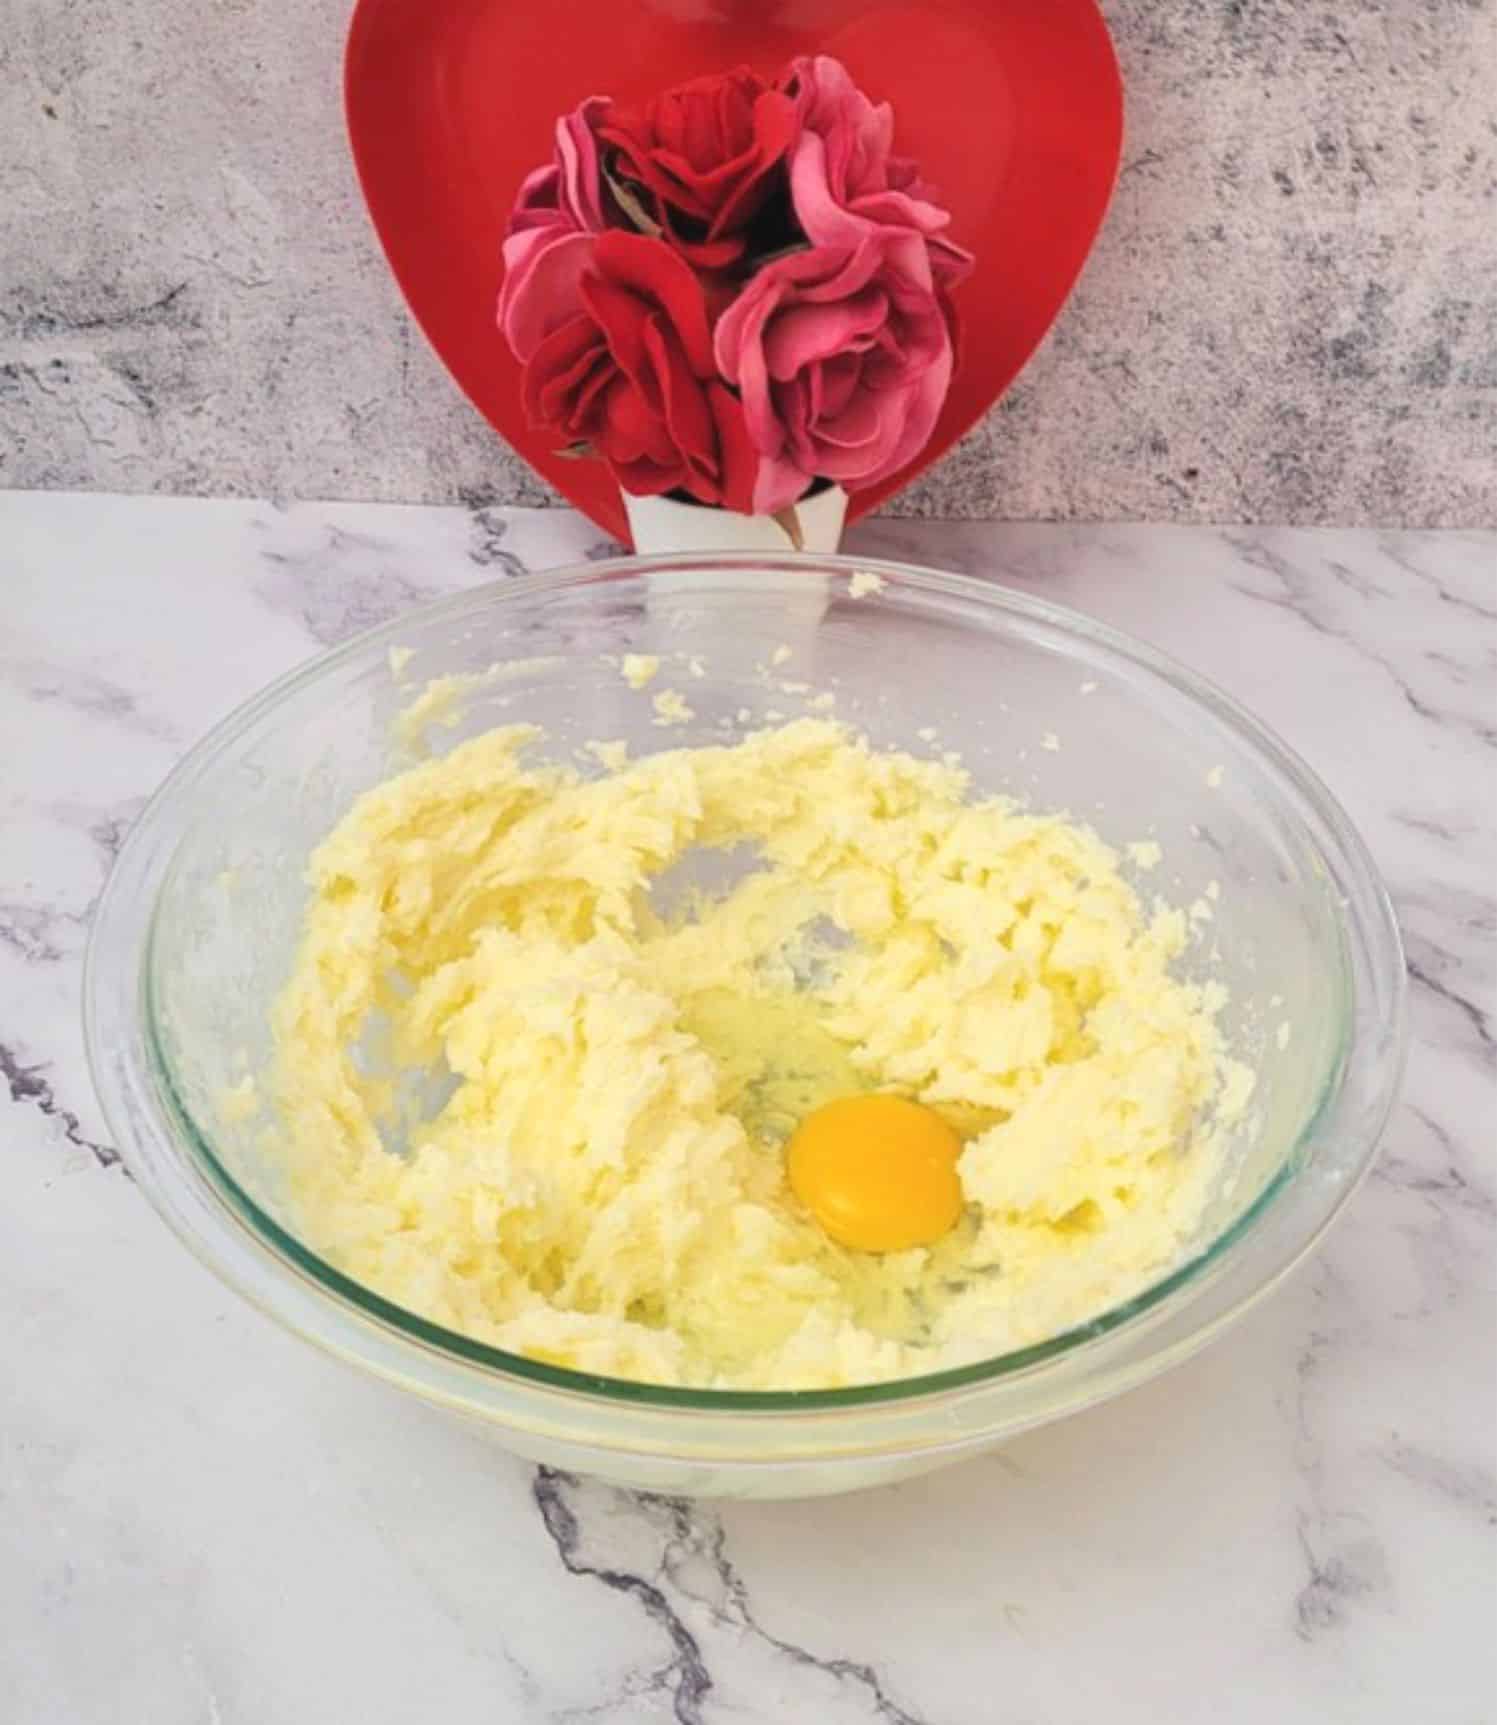
1 - Place butter and granulated sugar in the bowl of a stand mixer fitted with a paddle attachment (note - a hand-mixer may be used). Mix together on medium speed until the mixture becomes light and fluffy, about 2 to 3 minutes. Add egg to mixing bowl. Mix on medium speed until combined, scraping down bowl as needed.
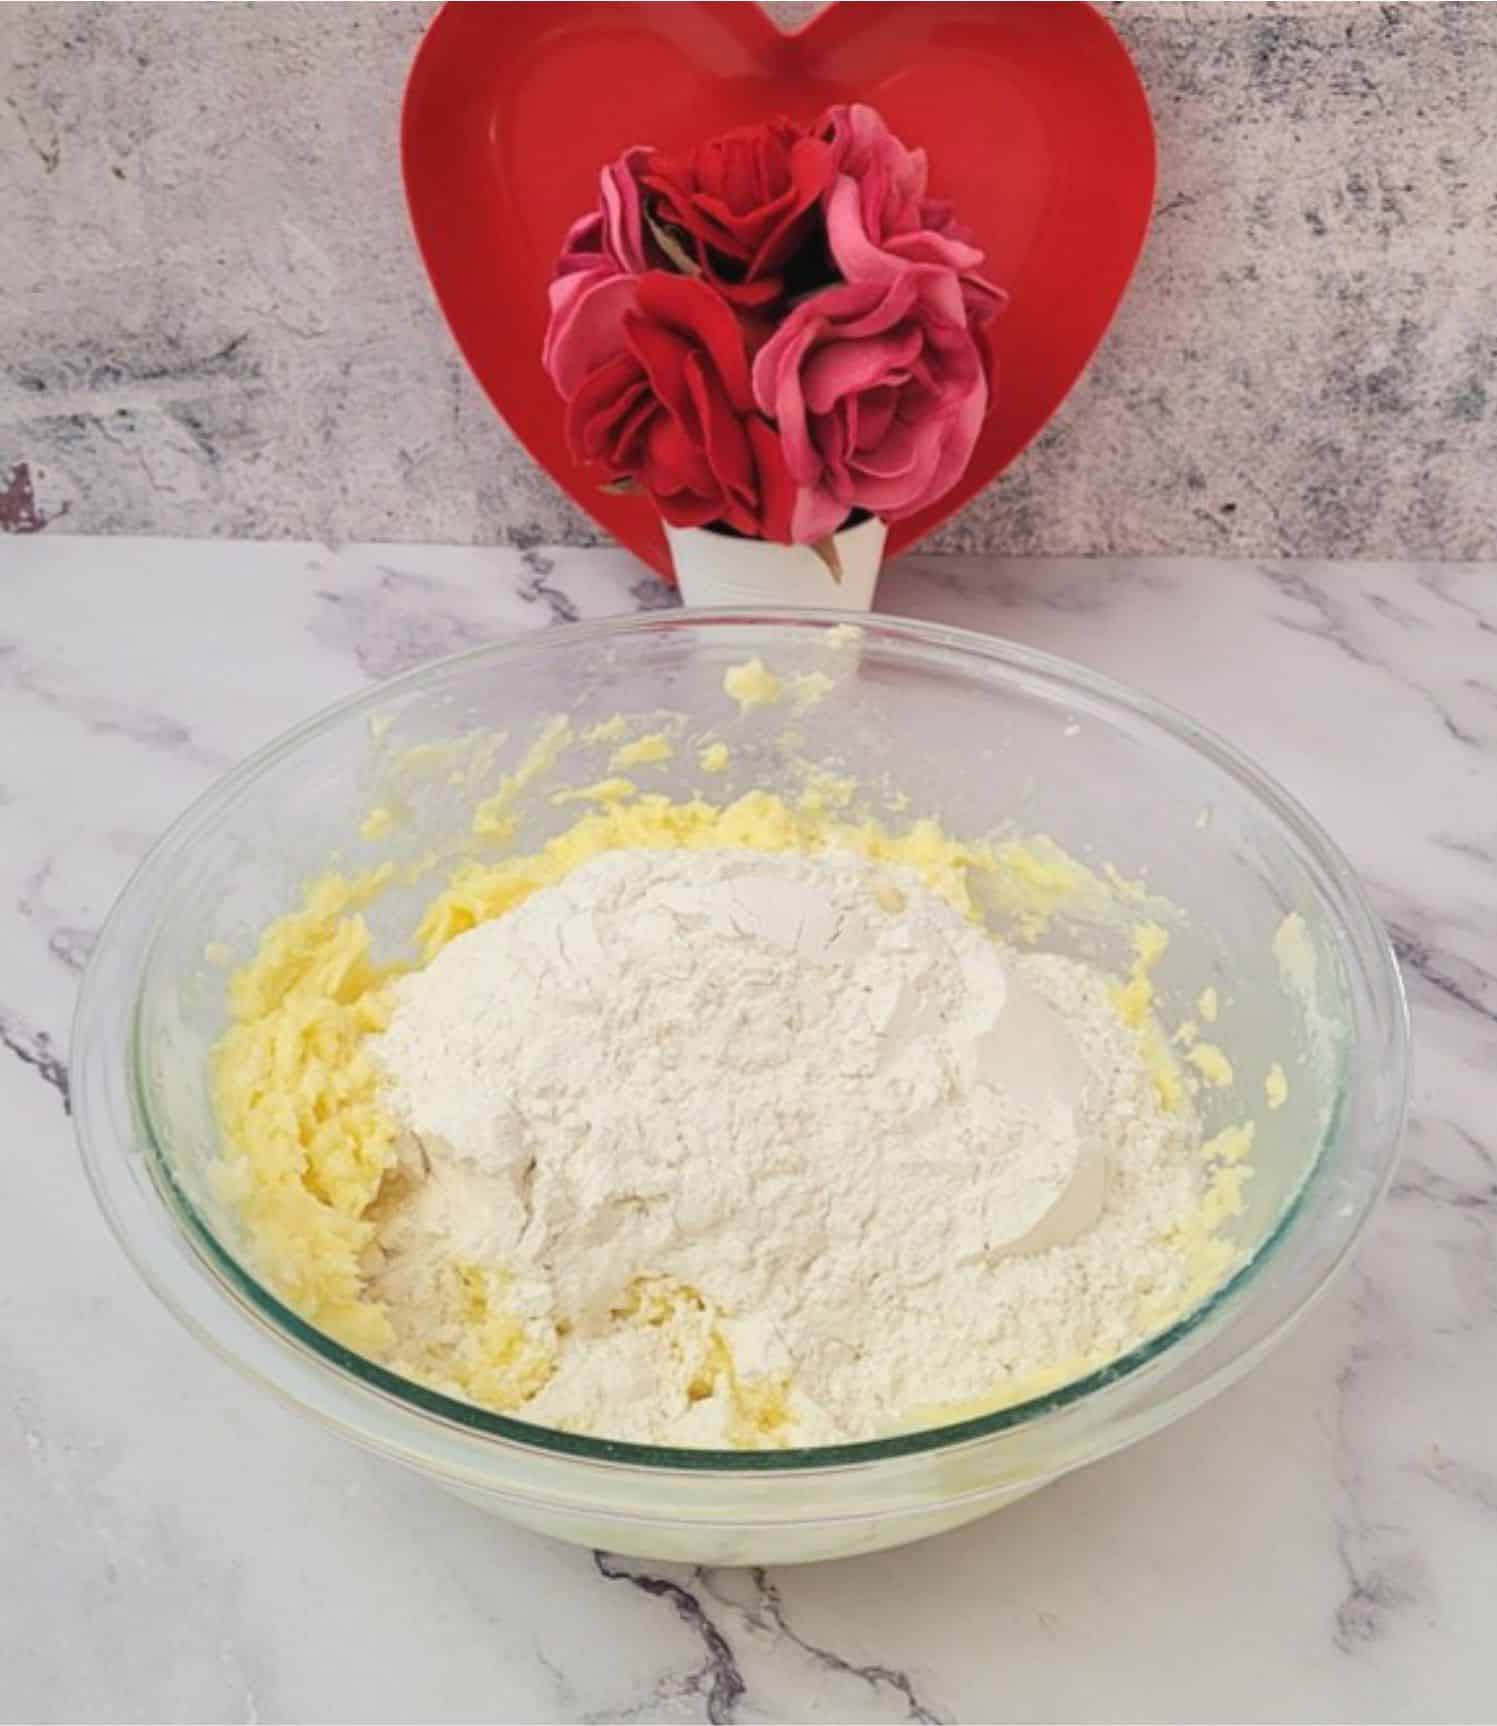
2 - Add all-purpose flour and salt to mixing bowl. Mix on low speed until well combined. Scrape down side of bowl as needed. The dough will be thick and may seem slightly dry at this stage, but this is perfectly normal.
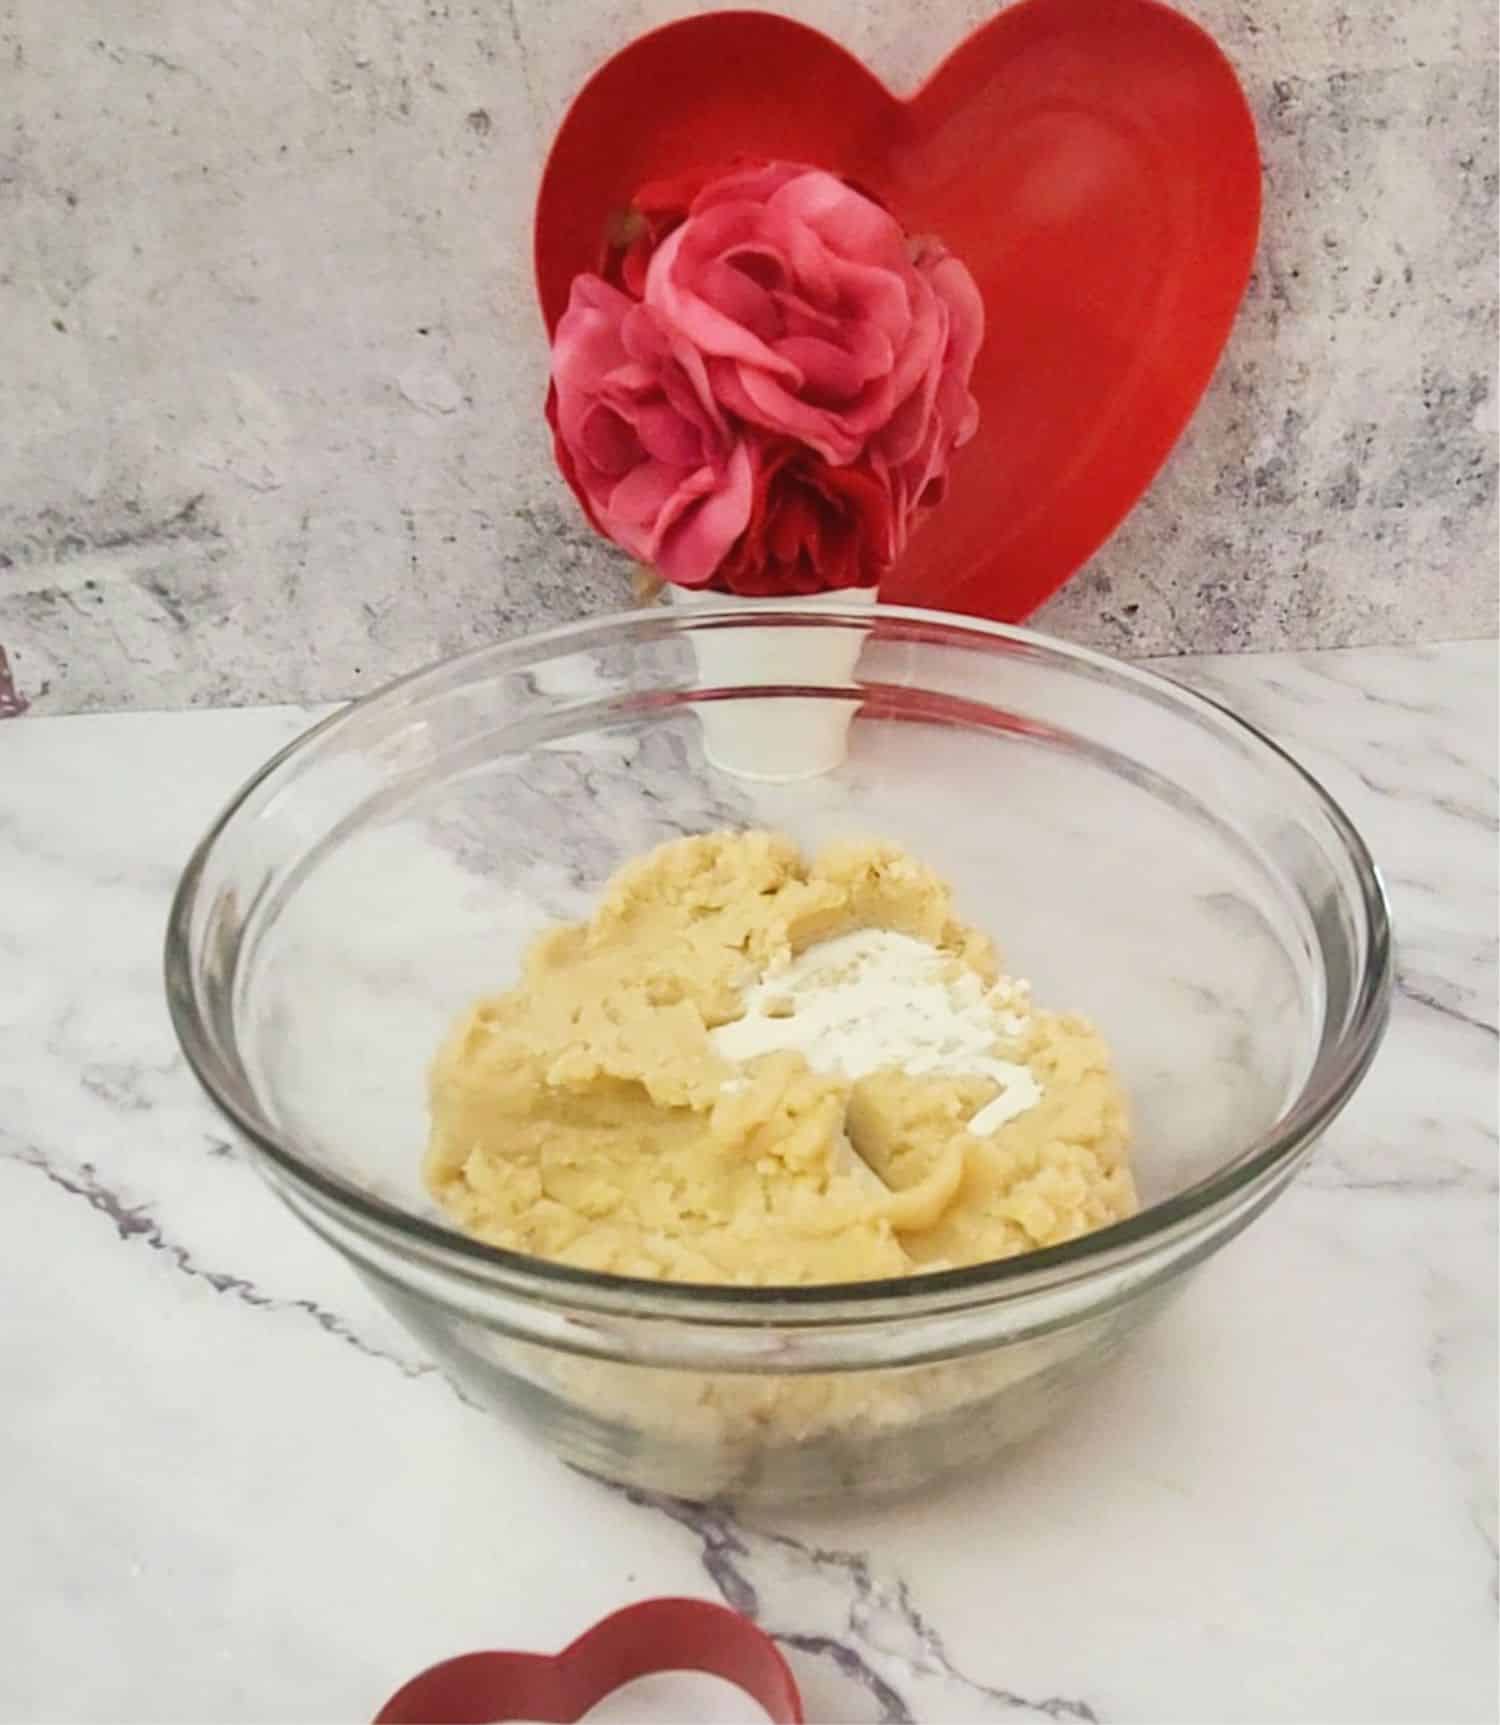
3 - Add vanilla and 2 tablespoons milk. Mix until smooth. Ensure the butter cookie dough has the right consistency—thick but soft enough to be piped smoothly. If the dough feels too stiff, add milk a teaspoon at a time until it reaches the desired texture. Be careful not to overdo it, as adding too much milk can cause the cookies to spread excessively during baking.
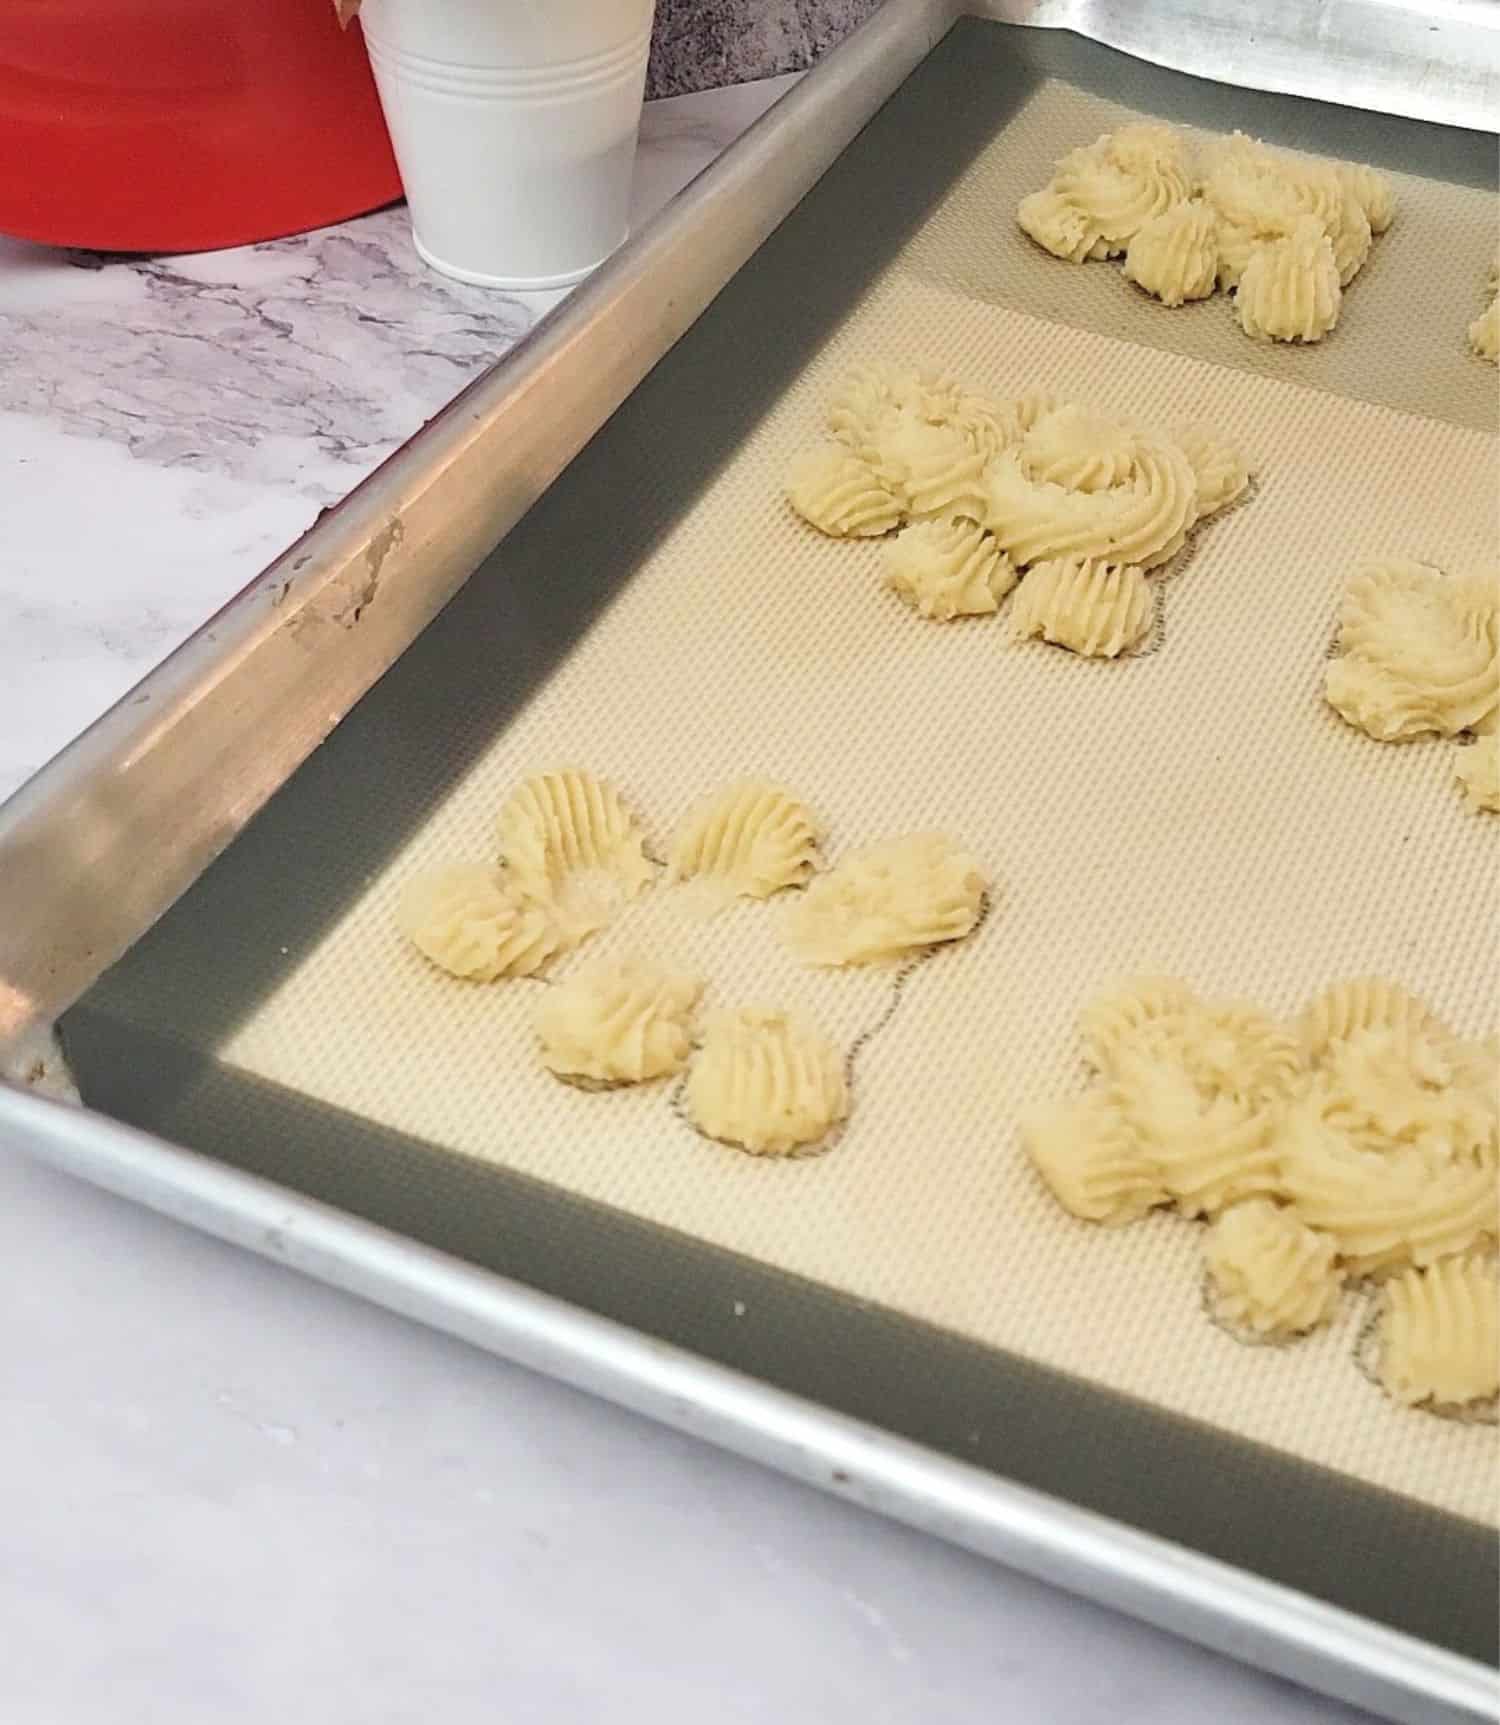
4 - Transfer about a cup of dough to a pastry bag fitted with a large star tip. Avoid overfilling the bag, as the dough is thick and can be difficult to pipe if the bag is too full. Pipe small lines of dough to form the ears, arms, and legs.
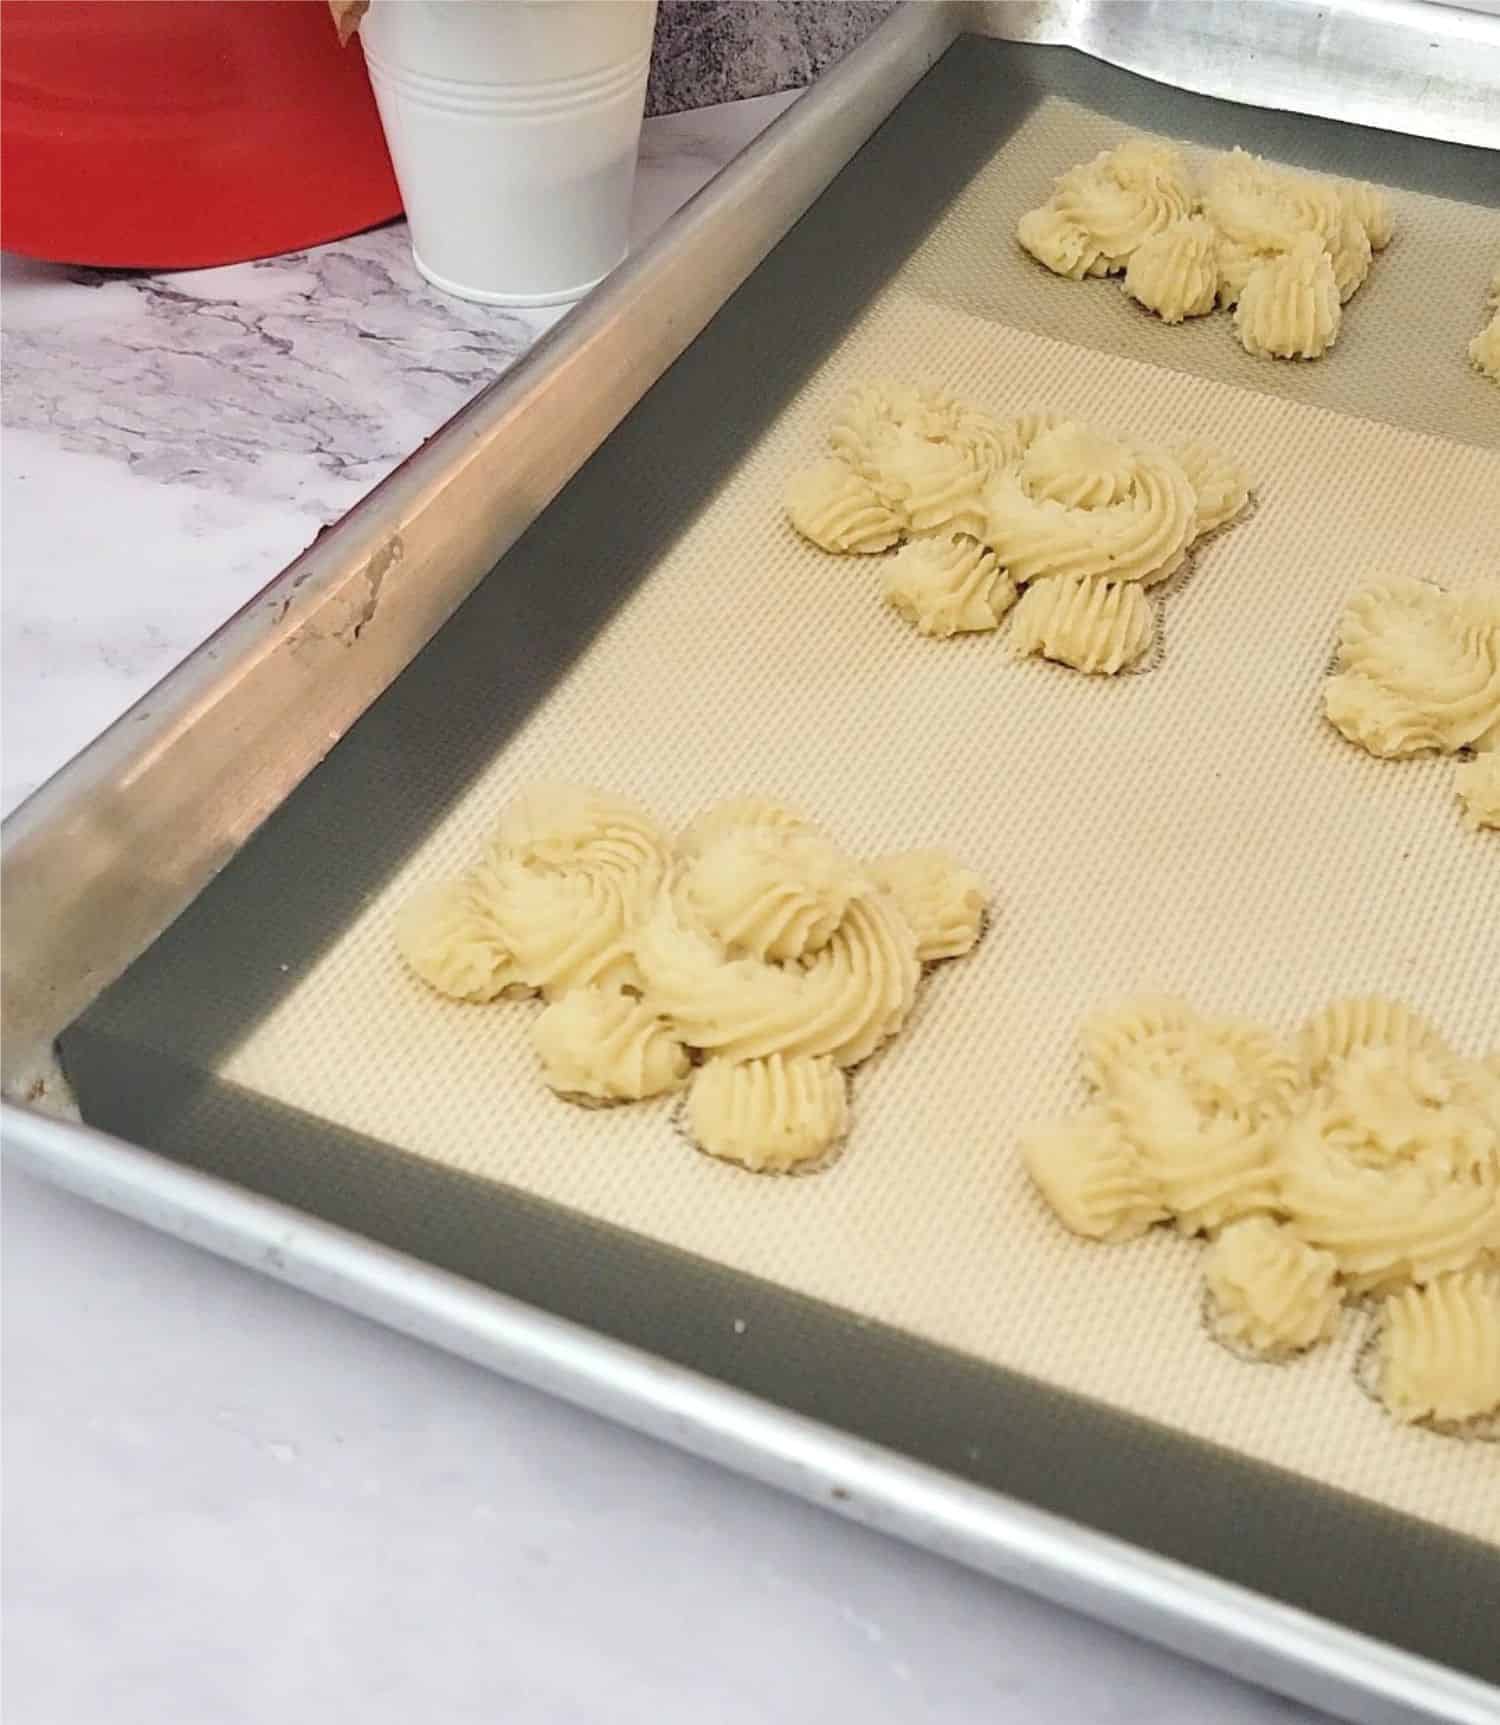
5 - Pipe swirls to create the heads and bodies. Place the baking pans in the refrigerator for at least 30 minutes. Chilling the dough is essential to prevent the cookies from overspreading during baking. Bake at 350℉ / 180℃ for 13 - 15 minutes, or until the edges are lightly golden. Allow cookies to cool before decorating.
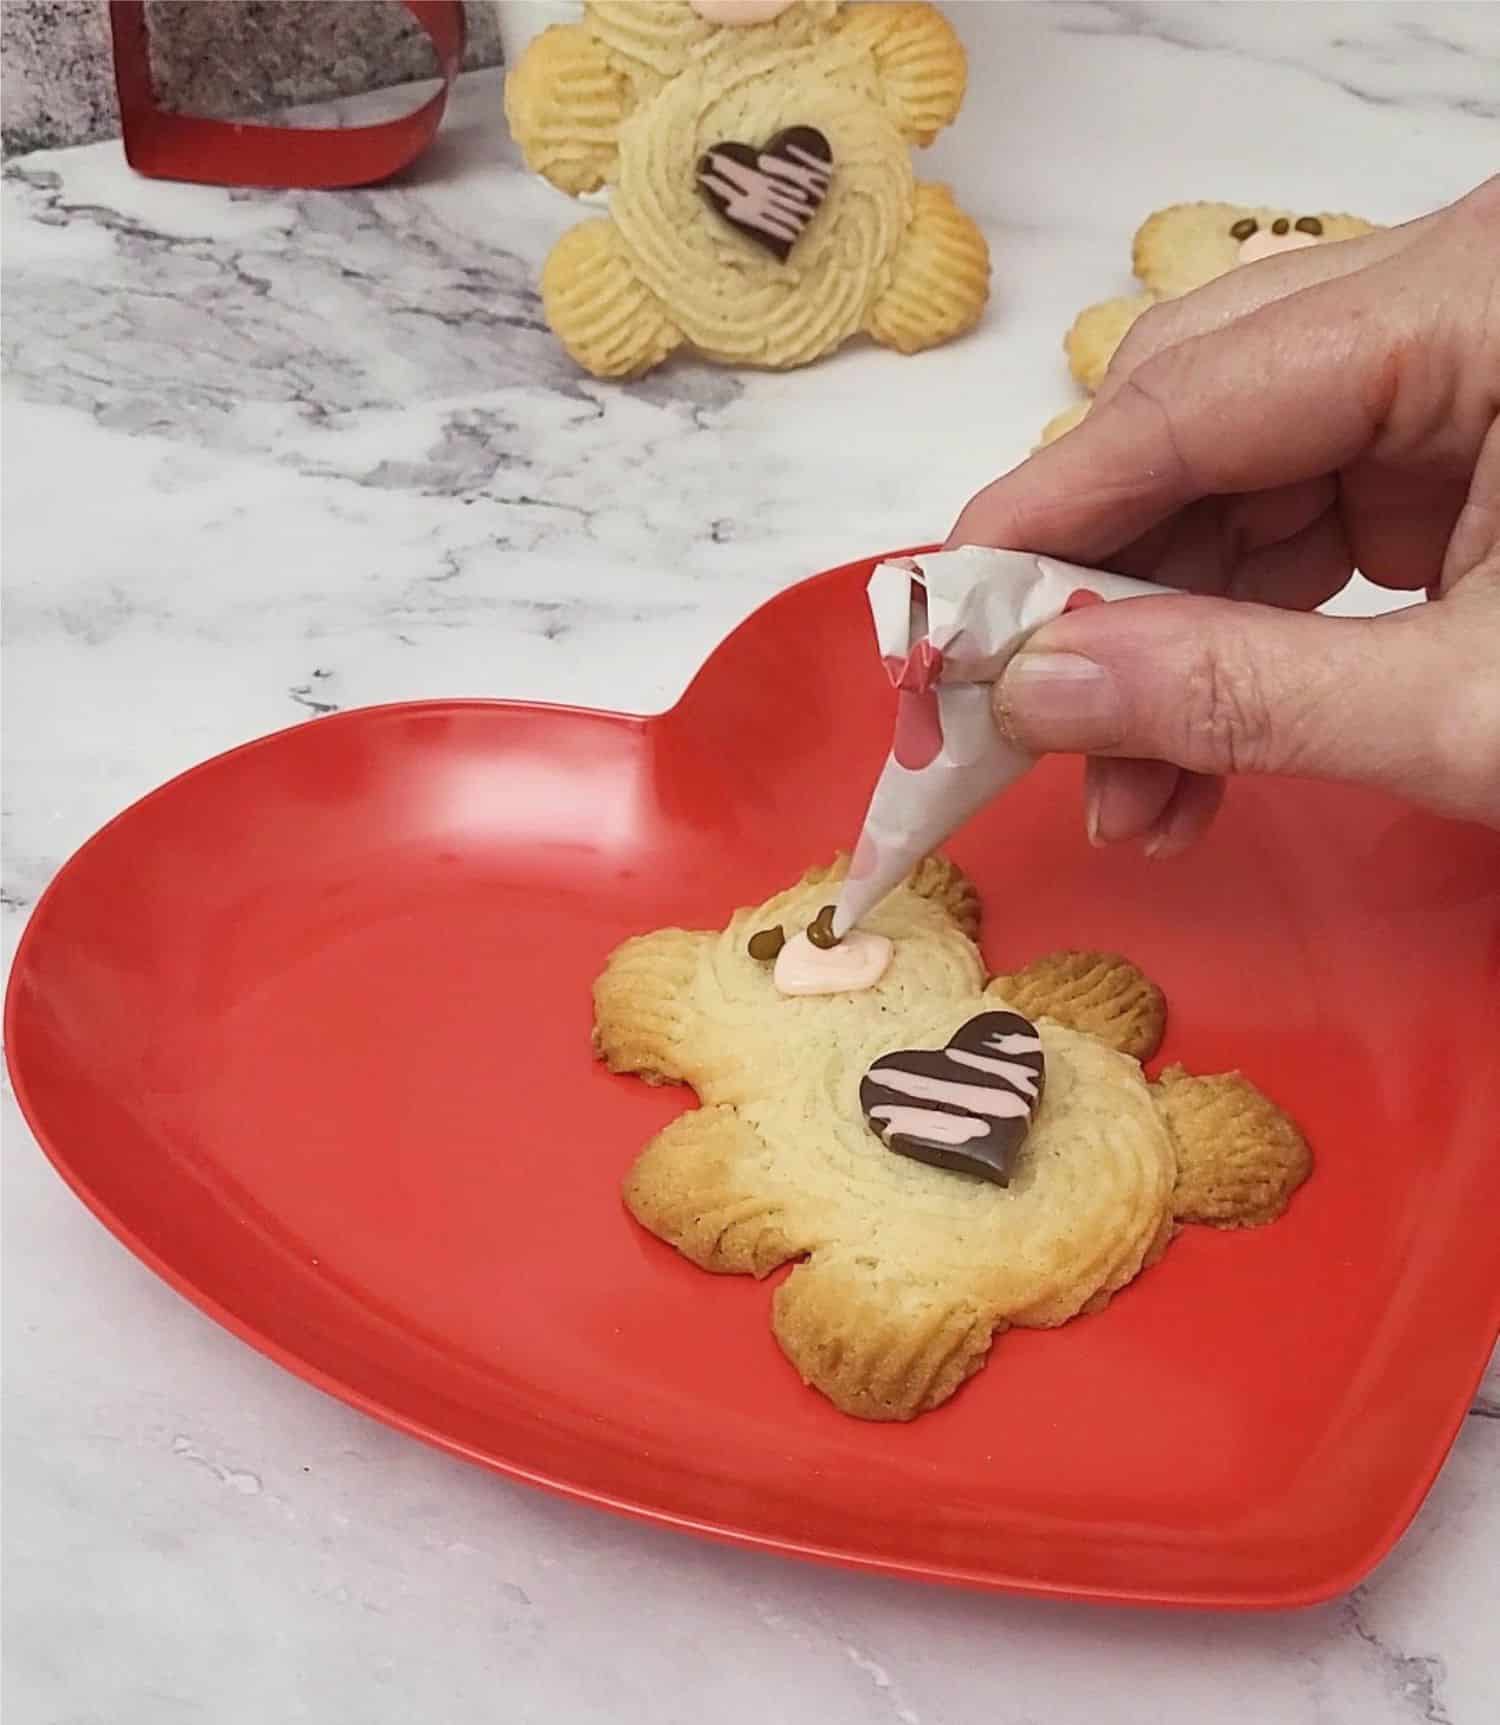
6 - Attach a chocolate heart to the belly of the bear with a small dab of royal icing. Pipe a small oval onto each bear's face to create the snout, using pink royal icing. Next, pipe a dot on top of each bear's snout using brown royal icing to create the snout, and two dots above the snout to form the eyes.
Equipment
You need the following equipment to make this Valentine butter cookie recipe:
- Cookie Sheet Pans Lined with silicone baking mats or parchment paper
- Hand or stand mixer
- Bowls, measuring cups and spoons
- Rubber spatula
- Pastry bags
- Large star piping tip
Storage
Place the Valentine butter cookies in an airtight container or tightly-sealed cookie tin, separating layers with parchment or wax paper. They can stay fresh this way for up to 4 days. Alternatively, wrap cookies well and freeze for up to 2 months.
More Valentine's Day dessert ideas
Looking for more sweets to serve your loved ones this Valentine's Day? Check out the following recipes:

I hope you enjoy these teddy bear shaped Valentine Butter cookies as much as my family and friends do!
📋 Recipe
Valentine's Butter Cookies
Equipment
- 3 Cookie Sheet Pans Lined with silicone baking mats or parchment paper
- 1 Hand Mixer or
- Bowls, measuring cups and spoons
- 1 Rubber spatula
- Pastry bags
- Large star piping tip I used an Ateco #824 tip which is approximately ⅜" in diameter.
Ingredients
Butter cookie dough
- 2 ¼ Cup All-purpose flour Sift to remove any lumps
- ½ teaspoon Salt
- 1 Cup Unsalted butter softened
- ¾ Cup Granulated sugar
- 1 Large Egg Room temperature
- 1 teaspoon Vanilla extract
- 2 Tablespoons Whole milk May need one more tablespoon depending on consistency
Decorations (optional)
- ¼ Cup Royal icing
- 16 Small Chocolate candy hearts
- Food coloring (pink and brown for bears' eyes and noses)
Instructions
Butter cookie dough
- Whisk together flour and salt in a bowl. Sift flour through a fine mesh sieve if necessary to remove any lumps. Set aside.2 ¼ Cup All-purpose flour, ½ teaspoon Salt
- Place butter and granulated sugar in the bowl of a stand mixer fitted with a paddle attachment (note - a hand-mixer may be used).1 Cup Unsalted butter, ¾ Cup Granulated sugar
- Mix butter and sugar on medium speed until the mixture becomes light and fluffy, about 2 to 3 minutes. Be sure to scrape down the sides of bowl as needed.
- Add egg to mixing bowl. Mix on medium speed until combined, scraping down bowl as needed.1 Large Egg
- Add dry ingredients (flour, etc..) to mixing bowl. Mix on low speed until well combined. Note: the dough will be thick and may seem slightly dry at this stage, but this is perfectly normal.
- Add vanilla and 2 tablespoons milk. Mix until smooth.2 Tablespoons Whole milk, 1 teaspoon Vanilla extract
- Ensure the butter cookie dough has the right consistency—thick but soft enough to be piped smoothly. If the dough feels too stiff, add milk a teaspoon at a time until it reaches the desired texture. Be careful not to overdo it, as adding too much milk can cause the cookies to spread excessively during baking.
- Transfer about a cup of dough to a pastry bag fitted with a large star tip. Avoid overfilling the bag, as the dough is thick and can be difficult to pipe if the bag is too full.
Pipe and Chill cookies
- Prepare 3 baking sheet pans: If using templates, place on pans. Place parchment paper or silicone baking mats over templates.
- Begin piping the bear cookies by following this pattern:Pipe small lines of dough to form the ears, arms, and legs.Pipe swirls to create the heads and bodies, ensuring the swirls are slightly larger for proper shape.
- Place the baking pans in the refrigerator for at least 30 minutes. Chilling the dough is essential to prevent the cookies from overspreading during baking.
Bake cookies
- Preheat oven to 350℉ / 180℃
- Bake one sheet of cookies at a time on the center rack of the oven. Bake for 13 - 15 minutes, or until the edges are lightly golden.
- Allow cookies to cool on baking sheets for 10 minutes, then transfer to a wire rack to cool completely.
Decorate cookies
- Use a small dab of royal icing on the back of each chocolate heart to attach it securely to the belly of each bear cookie.¼ Cup Royal icing, Food coloring
- Using royal icing, pipe a small pink oval onto each bear's face to create the snout. Ensure the oval is centered and proportionate to the bear's face for a balanced look.16 Small Chocolate candy hearts
- Using brown royal icing, pipe a small dot at the top of each pink snout to create the bears' noses. Then, pipe two small brown dots above the snouts to form the eyes.
- Set cookies aside for 20 minutes to dry.


Karen says
What size start tip are you using?
dessertswithstephanie says
I used an Ateco #824 which is approximately 3/8 inch in diameter. Thank you for pointing this out as I will update the recipe to indicate the tip size!